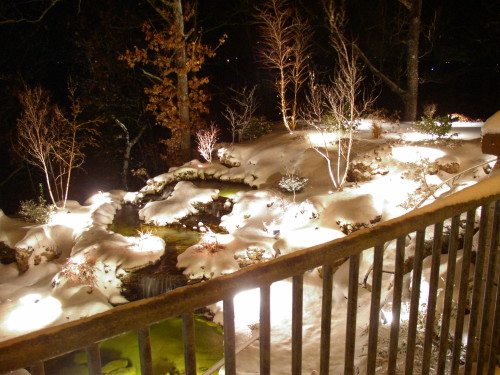
Basic Design Elements of Landscape Lighting
There are, in fact, only a few basic applications when it comes to landscape lighting. Much like there are only a few basic techniques to apply paint to a canvas or the mixing of words in a sentence. But as we all know, not everything we read is poetry and not every picture we see is captivating. The reality is that most of the pleasantries we enjoy in this world come from the inspired hands of men and women who take basic elements and mold them into something unique and breathtaking.
This, basically, is how one should approach landscape lighting.
The Applications:
1) Uplighting – The application by which light is applied to the desired object(s) from the ground, or a buried location, or any stationary position below the target area.
2) Downlighting – Same as uplighting, but from a secured position above the targeted area..
3) Pathlighting/Area Lighting – This application would include any of the variety of fixtures which have a “hat” on a stem which projects the light over a desired radius.
4) Specialty Lighting – This category includes things such as underwater fixtures, decks, masonry applications, and “gimmick” lights.
I would contend that these are the only applications of this industry. Other contractors might disagree with this premise; however, I am of the opinion that with a strong understanding of the first three applications, one can create beautiful and meaningful landscape lighting masterpieces!
The Effects:
1) Highlighting – The method of applying light directly to the desired object or area. This effect can be accomplished by all four applications.
2) Shadowing – The device by which you direct your light through a selected plant or tree, thus creating interesting shadows on a wall or surface. This method can also be accomplished by all methods.
3) Silhouetting – An advanced technique in which selected objects are “featured” by directing light upward from behind and simultaneously between the object and a wall.
4) Mirroring – Another advanced application where a body of adjacent water is used to capture the images of the surrounding lighting system, thus creating a mirror effect over the surface.
5) Washing – Method by which you apply massive amounts of light to a specified area. This technique often requires specific knowledge of the products and bulbs being used.
The effects I have listed are by no means all of the possible occurrences in the realm of landscape lighting. Often times some of the most striking and interesting things happen purely by chance. However, I would argue that one without intent hardy ever produces beautiful accidents.
Balance and Dimension:
OK, so now you have an understanding of the various effects lighting can produce, but how do you physically apply them or more specifically, where do you start?
This is sort of the gray area where the designer’s personal taste and preferences begins to take over. There are, however, two things that everyone must consider when designing your lighting system.
Balance and dimension
Balance is simply the evenness of light distribution across the face of your targeted area. If it is your house for example, you want to ensure that one side is not brighter than the other, that you used similar application on each side.
Dimension is the end result of a successful lighting job. This is accomplished in a couple of different ways: On a home, be sure to target the corners of each protruding wall, leaving the insets dark, this will define the structure of the dwelling. Avoid placing lights directly under windows if possible; this has a tendency to flatten the visual impact. Additionally, you should always try to light a few things away from the home, or in various areas of the landscape bed to pull one’s eye across the desired area. This is very similar to the way an artist would direct the viewer’s eye through a painting, rather than placing the focal point directly in the center of the canvass.
Technical Issues to Consider:
There is a variety of safety issues to consider when you begin to physically install your lights. The most important of which involves calculating the amount of wattage you have allocated to a particular circuit. This is accomplished by adding up the amount of wattage used by each bulb (ex. A 20 watt Halogen MR-16 uses 20 watts) on single cable extending from the transformer, in relation to the gauge of the wire used. That is putting it simply. It can actually get much more complicated when you factor in voltage drop and distance. My advice in this area is two-part, consult first the product guidelines as issued by the manufacturer, or hire a qualified contractor to install it for you. Remember, even if you hire a professional to install your lights, it doesn’t mean you shouldn’t be involved in the creative process of the design. After all, it’s your project and you should have a vision of how it should look completed!


Sorry, the comment form is closed at this time.